The Benefits Of Using Green Cleaning For Health And Wellness
March 2, 2023
How to Clean and Organize Your Closet?
April 3, 2023The Ultimate Moving Out Cleaning Checklist: A Step-by-Step Guide

The Ultimate Moving Out Cleaning Checklist: A Step-by-Step Guide. Cleaning for a move can be an absolute nightmare. Moving house is already considered one of the most stressful experiences in life, while cleaning house is often regarded as the most loathsome daily chore.
When you combine the two, the thought of scrubbing floors and washing windows after weeks of arduous moving preparations can induce panic. After all, you have spent countless hours organizing every detail of the relocation process, from paperwork to packing all your belongings. Read on!
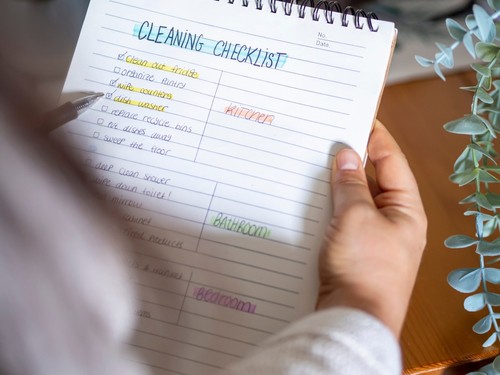
Ultimate Moving Out Cleaning Checklist
1. Remove All Nails From Patch Holes and the Walls.
Customizing your living space typically involves adorning the walls with decor that mirrors your taste and style. However, when it is time to relocate, you must eliminate these adornments, which can leave behind wall damage.
The same applies to any supplementary fixtures you installed, such as towel hooks, hat racks, clocks, furniture anchors, and shower caddies. Remember the struggle you encountered while drilling to install the TV? The holes left behind will be visible after the mount is removed.
2. Repaint
Many rental properties feature standard, neutral paint colors that cater to a wide range of tenant preferences. However, it’s understandable that you may have opted to personalize your living space by adding your preferred paint colors. As you prepare to move out, returning the walls to their original neutral colors is essential for the next tenants.
This is typically required by most lease agreements to make sure you return your deposit quickly. Non-neutral colors could impact the attractiveness and rentability of the property. Of course, if your landlord approves of your custom paint job, feel free to keep it. Please just be sure to obtain written consent to avoid any misunderstanding.
3. Wipe Down All Door Frames and Doors
Doors are frequently overlooked during routine cleaning, but a quick wipe-down can significantly enhance the overall cleanliness of your living space. This is not limited to room doors but also includes the doors of kitchen cabinets, bathroom cabinets, and other permanent fixtures. You may not even realize how dirty they’ve become until you witness the striking difference after cleaning.
4. Dust the Ceiling Fans
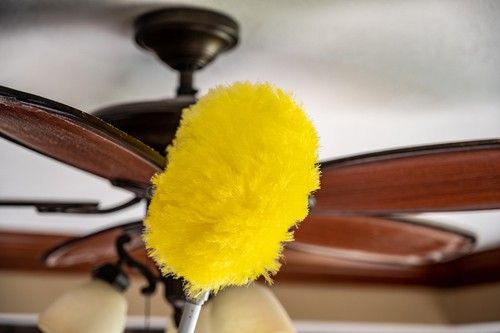
Most people avoid dusting ceiling fans during their regular cleaning routine, but cleaning them thoroughly before moving out is essential. Fortunately, there’s a simple and easy way to accomplish this task. You can use temporary tape to attach your duster to a long-handled tool, such as a broom. If your duster is bendable, even better! This way, you won’t need to search for a ladder to reach the blades, saving time and effort.
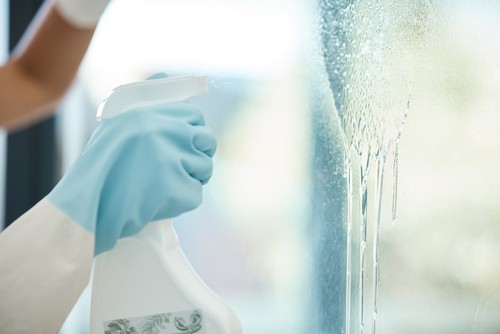
5. Clean Mirrors and Windows
Although it may seem minor, sparkling windows and mirrors can completely transform the look and feel of a living space. Before cleaning them, dust any blinds and clean the sills. Use newspaper instead of a paper towel or cloth for a streak-free finish.
6. Clean Out All the Cabinets and Cupboards
Emptying every cabinet and cupboard in the laundry room, kitchen, bathrooms, and closets is essential when moving out. Once opened, take the time to thoroughly wipe them down and remove any crumbs or debris. Additionally, remember to remove any sticky traps, pest bait, or air fresheners that may be present.
7. Deep Clean Any Showers, Tubs, Sinks, And Toilets
While it may seem obvious, it’s crucial to deep clean your showers and tubs thoroughly before moving out. Please take the time to remove any grime from the grout and drains, and then go over the sinks, including the faucets, until they’re green. Remember to scrub the toilet bowl, lift and clean the lid, and wipe the exterior.
8. Make Your Appliances Look Like New
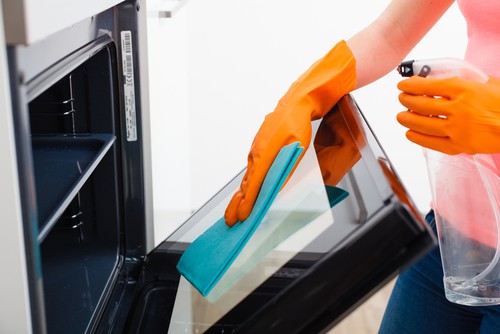
If possible, it’s recommended to deep clean your appliances before moving out. This task may require some elbow grease or hiring a professional cleaning service. Over time, machines can accumulate grime, so remove all items from the refrigerator and thoroughly clean the stove, oven, microwave, refrigerator, dishwasher, and any other appliances to make them appear as though they’ve been well-maintained.
9. Clean Baseboards and Dust Trim
Run a duster and wet rag along all the trim and baseboards in your home. These areas are often neglected, but a little cleaning can make a big difference in the final appearance of your space.
Luckily, you don’t need to scrub them on your hands and knees like Cinderella. Instead, grab a flexible bend and dust mop it up on one side. This will make it much easier to clean your baseboards without putting a strain on your back.
10. Vacuum, Mop Floors, and Sweep
Many cleaning checklists suggest leaving your floors in a “broom clean” condition, simply sweeping and nothing more. However, in my experience, more is needed. It is best to thoroughly vacuum all mop and carpet hardwood, tile, or other hard-surface floors. If you have a pet, remove any accumulated fur, especially in the corners and under the furniture that has been moved.
Additionally, check for any “accidents” on the carpet and spot-clean them to remove any evidence or clean the carpet entirely if necessary.
The Ultimate Moving Out Cleaning Checklist: A Step-by-Step Guide –
Conclusion

Review your lease and inquire with your landlord about cleaning checklists they may utilize during the walk-through apartment inspection. This ensures that you have covered all your bases. If you can’t get this information, it is recommended that you aim for a level of cleanliness that matches or exceeds the condition it was in when you first moved in.
Alternatively, you can aim for the level of cleanliness you would expect if you were driving yourself. Whether you opt for a move-out cleaning service or tackle it yourself, using this checklist will undoubtedly leave your apartment in excellent condition for the next tenant.
While a thorough cleaning does not guarantee a full refund of your security deposit (other factors come into play), it can make things easier with your landlord. By doing a great job on your move-out cleaning, you are saving them time and money, potentially increasing the chances of receiving more of your deposit back.